
")
")
")
PICADOR : Starting Guide
The start guide designed to help new users to install the software and handle the basics of the software.
Caution: This installation is recommended for computers running Windows 10 and x64 processor.
For versions prior to Windows 10, the system must have been updated (Windows Update).
"api-ms-win-crt-runtime-l1-1-0.dll" missing : https://www.microsoft.com/en-us/download/details.aspx?id=48145
Picador installation:
The installation can be started with the downloaded installer from www.treedim.com/en/download
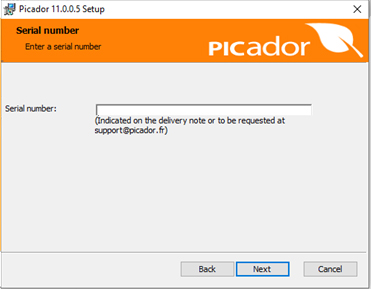
The serial number required in the installation procedure is noted on your delivery order.
Then, follow the instructions normally until the end of the procedure.
Picador activation:
After launching the application, complete the activation key request form.
Then, send it to


The activation key is returned by email (max 8 hours) after checking the validity of the Picador License.
Copy the activation key in the fields, then click the "OK" button


Picador and all the related modules are now activated on your computer.
Picador different modules:


Many features dedicated to logistics optimization: Palletizing, Packing (Filling tuck / case), Search Optimal Case, Palletizing bundles (case flat), Palletizing cylinders, Added top cap, protective film, angles, Truck load optimization of pallets, ...
Geometry (the basics of CAD drawing with Picador)
Toolbars:
All the functions and drawing tools are grouped in the form of icons in toolbars. Which are posted around the software window. To keep a clear interfaces, all toolbars are not visible in permanence. The display list of toolbars and available by right clicking in the toolbar area.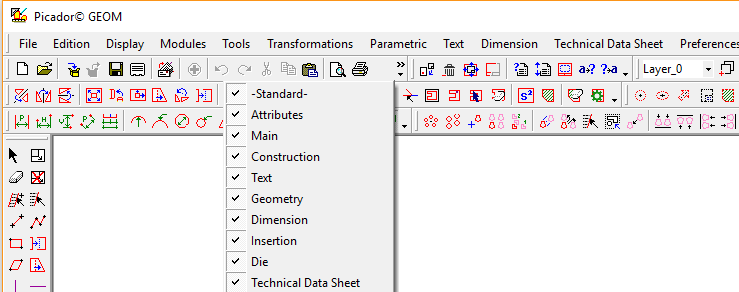
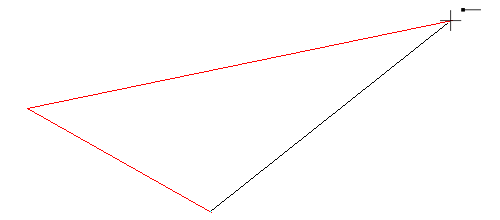
The point selection and main snap point features :
To construct a geometry using functions like Segments 2 points1 - Selection of a point with just a click when the snap assistant is visible sides of the mouse cursor:
The point selected is the extremity of a segment or arc
![]()
The point selected is the midpoint of a segment
![]()
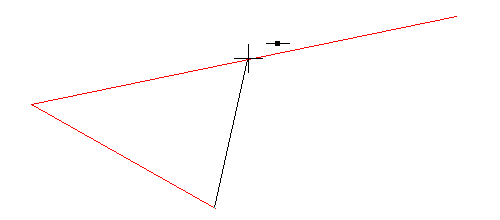
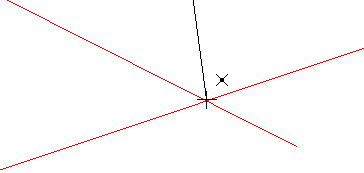
The point selected is the intersection of two segments or construction lines ...
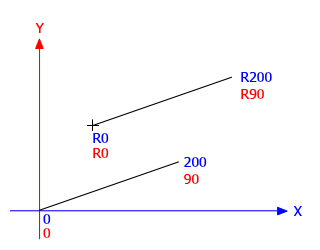
2 - By entering the coordinates of the point. Defined by the position of the point on the X and Y axis.
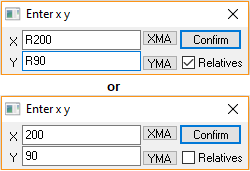
When a coordinated is defined in Relative terms (by adding "R" or "r" before the value), it is defined from the previous anchor point.
The Pen attribute selection ( rules type)
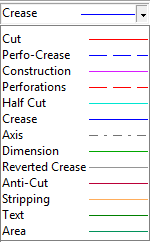
The designs made with Picador respect the standards attributes and rules used for packaging or displays designs. The plan, which are drawn with Picador represent the packaging design, but also tooling plan, then we can talk about cutting plan. The pens of different colors directly define rules that will be used on the cutting tools (dieboard) .
Draw using construction lines (guides) : 


Once in place, the "construction lines" or "guides" create reference lines and attachement points to build the geometry.
Navigation:
To move in the document, use the arrow on the keyboard.
To Zoom forward and backward, use the mouse wheel.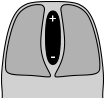
Tip: the zoom is centered on the mouse pointer.
Use the Z key to fit the view drawing in the windows.![]()
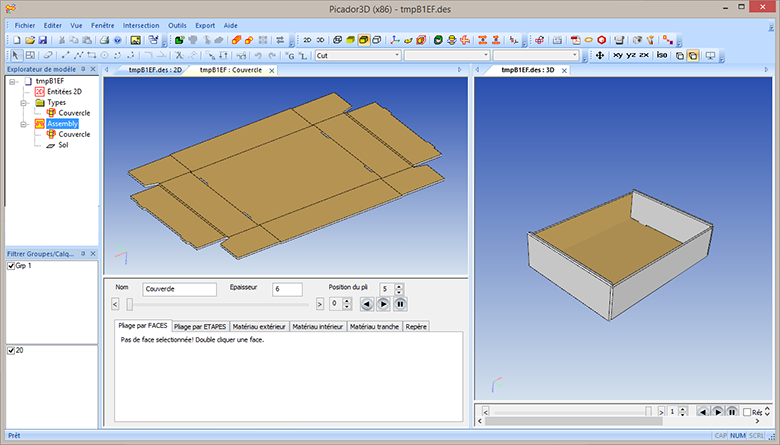
3D Folding
Transfer of 2D drawings to 3D Picador
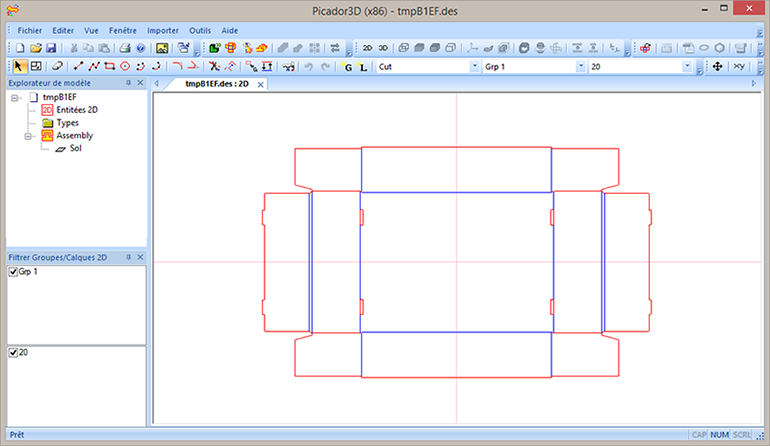
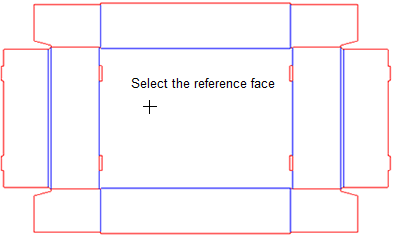
When the 2D drawing is sufficiently structuraly definined, it is possible to realize a 3D folding prototype.
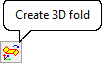
This requires to transfer the 2D drawing to Picador 3D, using the "Create 3D folding" function in the Picador Geometry toolbar.
New Picador 3D window opens with the 2D drawing displayed.
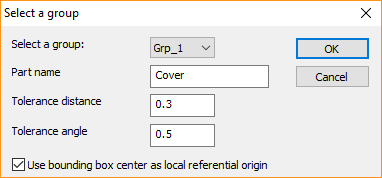
Create a 3D folding
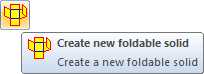
Create an automatic 3D folding shape from your 2D design, by using the function: "Create a new foldable solid"
A window appears, enter the name of the object (bottom, cover, box ...), then confirm.
Training
treeDiM - Picador or its partners provides online training sessions for the basics and for the use of advanced features of PICADOR software. Tutorials and Videos are available on https://www.treedim.com/en/training