


Tutorials
From finding your way around the interface to building your own parametric templates, here is the complete PackLib path.
The illustrations below were captured with the French interface, the only set available. Menus and buttons are named in the text exactly as they appear in the English interface.
1. How the interface works
A PackLib window is made of three areas:
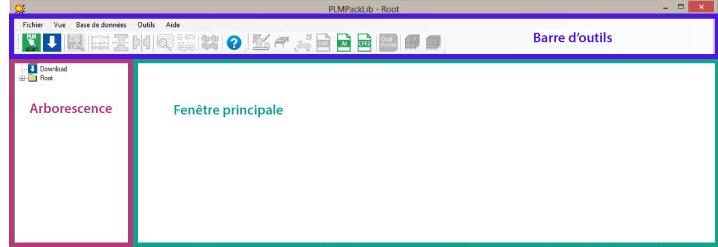
Starting up
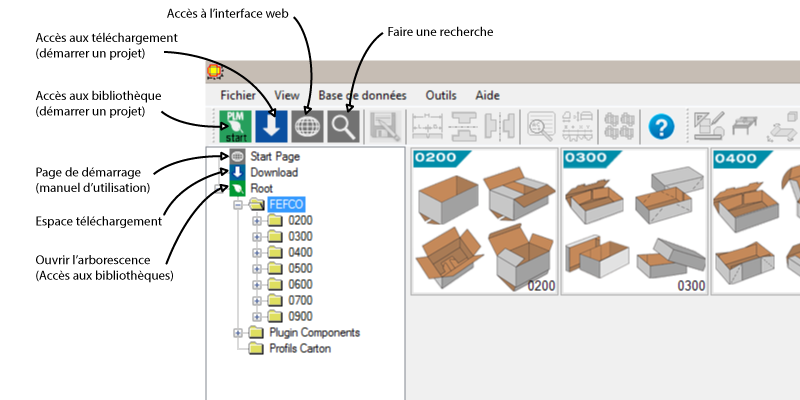
On launch, PackLib may open this documentation in a panel of the software. To start working, open the tree:
- by clicking the green start button in the toolbar;
- or by clicking Root directly in the tree.
The blue button opens the download area, which gives access to every PackLib template library (see Downloading new libraries).
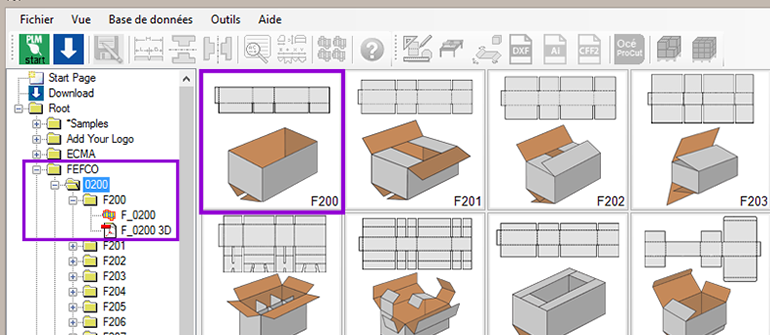
Browsing
You can browse either through the tree on the left or through the thumbnails in the main window. Each template exists as a 2D version (the flat drawing) and, for a large part of the catalogue, as an animated 3D version.
Adding to the tree
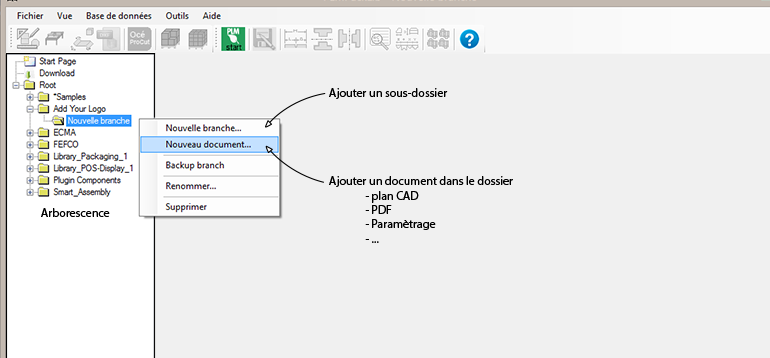
Right-clicking a folder in the tree lets you add a new branch (a sub-folder) or a new document: CAD drawing, parametric component, PDF, office document, image.
2. The resizable standard libraries
PackLib is a library of packaging, POS display, stand and furniture templates, all resizable. Its content is sorted into several libraries:
- the standard packaging classifications: the FEFCO code for corrugated board, the ECMA code for folding carton;
- a library per template family: packaging, display and POS, tray, wrap, re-board, furniture, office accessories, labels;
- your own libraries, which you build and organise freely.
Every template is parametric: its dimensions are set in the parameter panel and the drawing is recalculated immediately. That is what separates a PackLib standard from a merely archived drawing.
3. How Smart Assembly works
Smart Assembly is a design approach based on assembling components and sub-components. It lets you browse several thousand combinations graphically while keeping a consistent structure.
A pack is described by three main components: the base (the box body), the top architecture and the bottom architecture. Each carries its own functionality, which is what makes it possible to optimise the pack against its actual use.
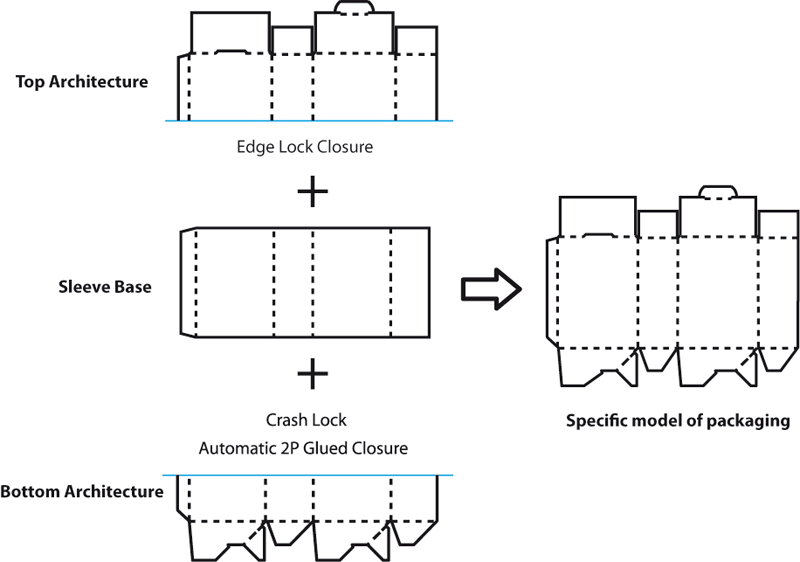
Building the half-architectures
Each half-architecture is built around a box body matching the chosen packaging style — here, the carton sleeve. Sub-components are then attached to it: closure panel, side flaps, bottom.
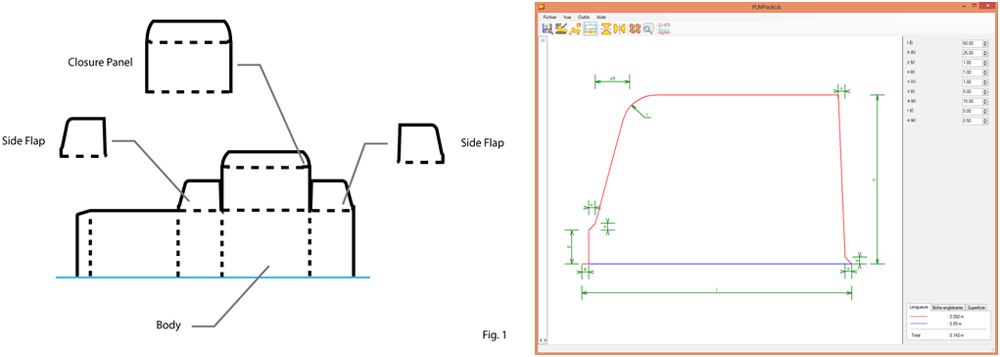
The process is fully automatic, yet each sub-component remains individually adjustable to meet manufacturing and usage constraints. Smart Assembly therefore stays simple to use while allowing professional-grade tuning.
Architecture variants
Each half-architecture also offers options that improve the use of the pack or change its closing or hanging system. A variant is obtained by adding one more sub-component: the tuck end, for instance, comes as thumb hole, hanging panel, tongue lock and mailer lock.
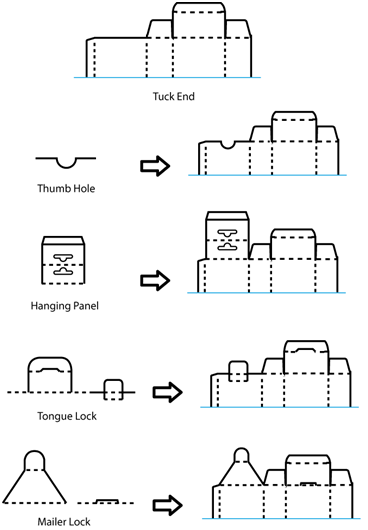
The system is open: you can integrate your own sub-components and build a library that carries your company's packaging design know-how.
4. Downloading new libraries
PackLib gives access to a broad base of packaging and POS display solutions. Downloading extra libraries widens your offering and saves time on recurring requests.
Opening the download page
Three routes lead to the same place:
- the View → Download page menu;
- the
 icon in the toolbar;
 - the Download entry in the tree.
Selecting and downloading
Select the library you want: the row is highlighted in blue. The buttons on the left then offer two modes:
- Download and add — only the files missing from your library are added; your existing documents are left untouched;
- Download and update — the whole library is retrieved and files with the same name are replaced.
The Info button shows the details of the selected library before downloading.
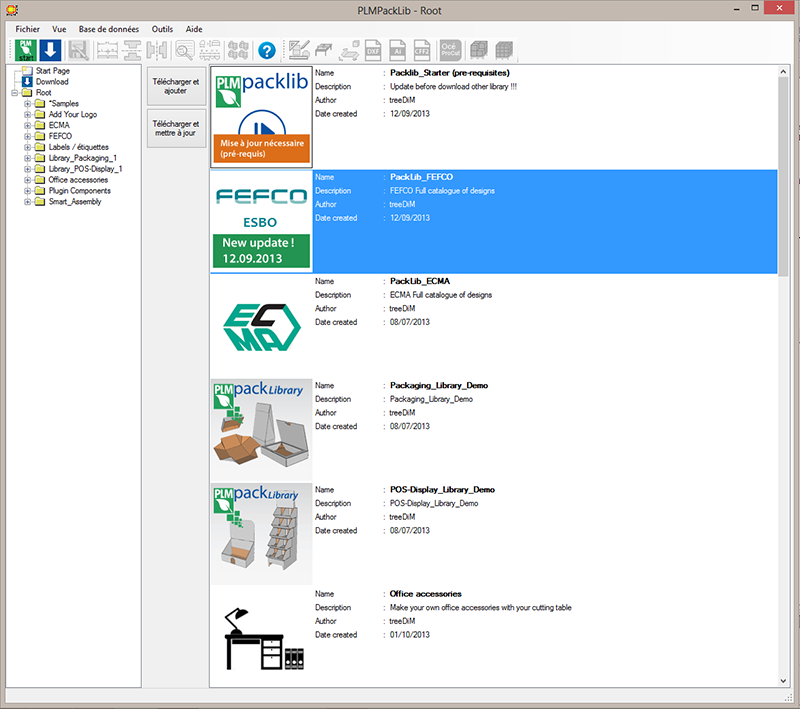
Loading can take a few minutes depending on the size of the library. Once it is finished, click Root to find the new library in the tree. Access to the download area is one of the Premium functions — see the FAQ on licensing.
5. Creating your own parametric templates
With Picador you turn your existing drawings into parametric templates, which can then be resized from PackLib like any other standard.
Step 1 — the parametric toolbar
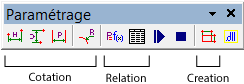
Step 2 — define the parametric dimensions
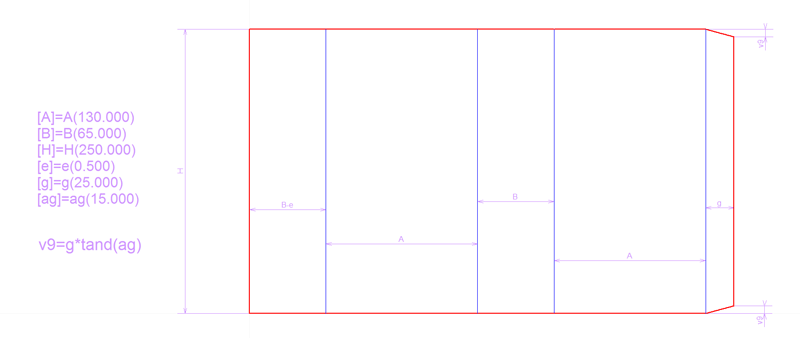
Place the parametric dimensions on your Picador drawing, then establish the relationships between parameters using mathematical formulas.
Step 3 — save the component
Save the drawing as a parametric component (a .dll file). By default the component
is generated in C:\PICADOR\Plugins.
Step 4 — add it to PackLib
In the PackLib tree, right-click the destination folder, choose New document… and point to the component. The context menu also lets you create a New branch…, rename or delete an item.
Once integrated, your library saves a considerable amount of time on later projects: a custom solution is derived in minutes, and your know-how is structured rather than scattered.
TreeDiM is an accredited training organisation and offers training in parametric design. You can also have your templates parametrised and integrated into your PackLib for you: see Services.
6. Sharing the library across several workstations
On installation, every workstation running PackLib has its own local database. Moving that database to a shared folder lets everyone work on a single library.
1. Prepare the shared folder
Create a PackLibDATA folder somewhere on your local network. It will hold the
PackLib documents.
2. Copy the reference library into it
From the workstation used as the reference, copy the PackLib data folder into
PackLibDATA. By default that folder is:
%AppData%\treeDiM\PackLib\Data
Paste that address into the Windows Explorer address bar to open it directly. The database
itself is the PicParam.db file in the Database sub-folder.
On older installations the data lived in C:\wPicador\Data8. When in doubt, the path actually in use is shown by Database → Define database path….
3. Point each workstation at the shared database
On every workstation to be synchronised, open PackLib, then Database → Define database path… and select the file:
…\PackLibDATA\Data\Database\PicParam.db
Confirm, and the workstation now works on the shared library.
4. Back up regularly
Also create a Save folder inside PackLibDATA and use
Database → Backup… to drop a backup there regularly. Should anything go
wrong, Database → Restore the database from zip file… puts the library
back.
The data stays on your local network: nothing travels over the internet. On the other hand, avoid having several workstations modify the library at the same time — reading together is fine, writing simultaneously to a network share can damage the file. A regular backup remains the best guarantee.
7. Ordering custom templates
A template is missing from your library, or you want a whole range parametrised? TreeDiM builds parametric packaging and POS display templates to specification. The Services page lists what we need in order to quote — expected drawing, dimensions to make variable, manufacturing constraints.
8. The eco-design approach
Eco-design means taking the environment into account from the design stage, in order to reduce a product's impact across its whole life cycle — raw material extraction, production, distribution, use and end of life — without degrading its fitness for purpose. It is a preventive approach: it acts where the room for manoeuvre is greatest, before the product exists.
PackLib contributes concretely. Comparing several structures at equal function, measuring the developed board area, testing nesting on the purchased sheet format and simulating palletisation all allow decisions to be made on figures rather than on intentions.
To structure a full approach, several bodies publish guides and tools — in France the ADEME and the Conseil National de l'Emballage in particular. They are the first to contact.